How to create an HDR (high dynamic range) image with Photoshop and Photomatix Pro
An HDR is an image that has a lot more colours than a standard picture, sometimes these colours are not even distinguished by our eyes, but with that much colour information, it is possible to create cool effects by mapping those colours to a colourspace that our eyes can see and the screen monitors can display. It can also be used when taking a picture of scenery that has areas too dark and too bright to capture in a single shot, HDR software will basically take balancely exposed dark areas from overexposed photos and balancely exposed light areas from underexposed photos and merge them together. The latter does not require special colour manipulations after, just plain software image merging.
Here are some examples of HDR mapped images that I took. You will be surprised how boring the source images are:
Making an HDR consists of two major parts:
Taking photos:
First of all, to get a very high colour range, you need at least three photos of the same object at different exposures. Usually -2 stops, 0 stop, and +2 stop. Of course other setting are widely used (e.g. -0.5, 0, +0.5, -1, 0, +1) and more than 3 photos (-2, -1, 0, +1, +2) etc.. But the minimum is always three. This can sometimes prove difficult, because you have to keep you camera perfectly still for all 3 shots, so you need to consider a lot of factors like: wind, mirror movement, camera shake when you press the shutter button, the depth of field change when using different apertures, maybe quickly moving clouds ... There is a little cheat however: many cameras nowadays have AEB: auto exposure bracketing. If you enable this setting, it automatically changes the exposure for the next 3 shots (varies on different cameras, can be 6 shots in F0.5 steps, etc). So, for example, on my Canon 400D, all I do is, set AEB to -2, 0, +2 (in the Camera Menu, first tab), then set the camera to "timer mode", adjust shutter speed and aperture for desired Depth of Field (I also found fast shutter speed a more favourable setting), fix the camera on a tripod and press the shutter button. The camera takes 3 shots one after another, at -2, 0 , +2 stops. This obviously is the quickest way to take 3 shots, which minimizes effects from wind, movement, etc..
Alternatively, if your camera does not have AEB, just take a photo at normal exposure, then very carefully change the camera setting to underexposed and take a picture and do same for overexposed setting. Take a photoshoot with many sets of 3 photos and download those pictures to your computer. Now the major part is done :)
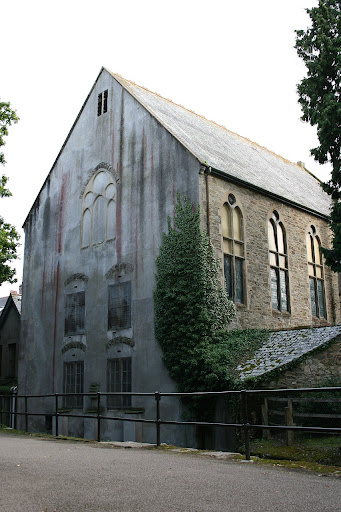
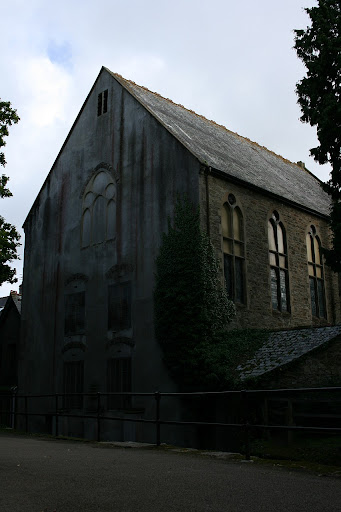
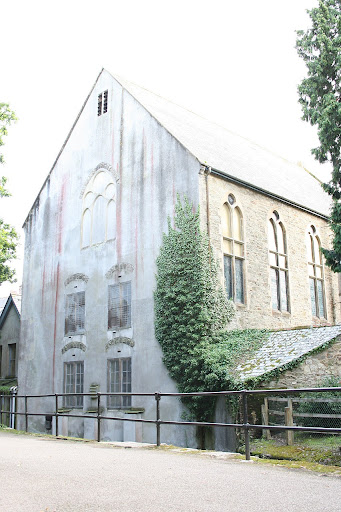
As an example, below are three images that I took as using AEB(notice that the first photo has washed out sky, second photo has better looking sky, and the third has balancely exposed small house on the very left side of the photo):
Processing photos with software to create an HDR:
Update: Photoshop CS5 now has HDR image toning and much better HDR controls, so the "grudge" effect is not needed anymore.
The second part of creating a good looking HDR image is to merge the three photos above into one, which will have high dynamic range colour information. Photoshop is a very popular photo editor and it can be used to do this. Usually, I create HDRs with exhaggerated colours, looking unrealistic, but cool (see the slidewhow), but with Photoshop it's quite tricky to create such HDRs (possible but takes a while), compared to other HDR generating software (which will be described later). Nevertheless, I'll describe some commonly used setting when using Photoshop to form an HDR. Using the above images as an example, when Photoshop merges images into an HDR it only takes e.g. blue skies from the underexposed picture, tree clours from the overexposed picture etc... And colour manipulations are done to already formed HDR and of course this can be used on any image, not just HDRs. So what I usually do in Photoshop is open all images in Photoshop, then increase each image saturation slightly (depends how you like it) by going to Image > Adjustments > Hue/Saturation... and then I increase the conrast in each image (e.g. for this example I want the sky in the second picture to have more contrast) by going to Image > Adjustments > Curves... and changing the diagonal line to a very well known "S-curve" (or inverse S-curve for the sky, select one or another to increase the contrast)


The resulting images look a bit more promising(save them somewhere on your hard drive):
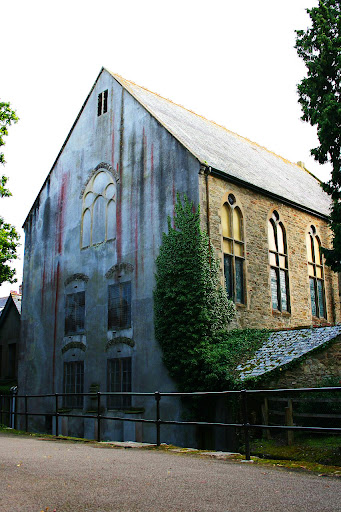
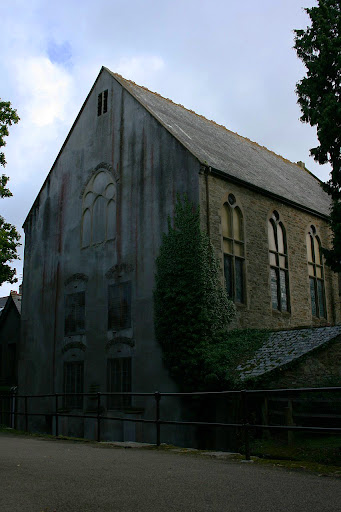
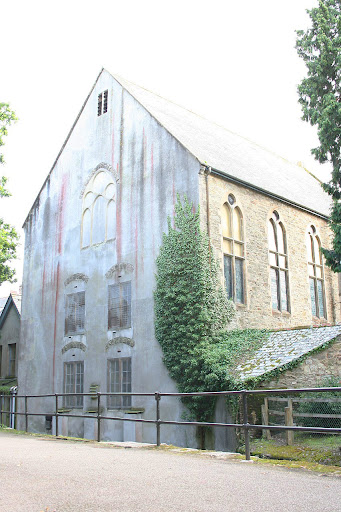
Now go to File>Automate>Merge to HDR... Then select your files (either unmodified files on your hard drive or click "Add open files") and click ok.
Then you will be shown a new preview of your new HDR. This Photoshop feature doesn't do any cool effects, it just basically takes the highest colour information from each picture, e.g. it takes blue skies from the underexposed picture and so on. Set the white point preview, until the detail you interested on the picture is balancely exposed (I aimed for slightly bluer skies) and then click ok. Note: in some situations this manipulation on its own is very useful, as it brought together blue skies (which were very washed out) and dark building (which was very underexposed together). If this is what you aiming for, you just need to convert this image to 16bit one; read below about conversion)
The image has 32bit colour depth, i.e. millions of colour tones per pixel is stored, but most displays can't even output those shades, so we need to convert this image to what it is in standard 16 bit colour depth. To do that go to Image>Mode>16bit/Channel...
A new windows will pop-up asking how you want to do the conversion from 32bit to 16bit, the most commonly used one is Local Adaptation, so select it from the drop-down list. The picture preview will suddenly start to look very different, move the bottom left slider of the diagonal line to the very bottom point of the histogram (grey curved area) and the top-right end of the line a bit down until you get naturally looking contrast in that image (there are of course other ways to convert the image, it's best to play around with this setting and select the one that you like, you can create new point on the line and drag them up or down).
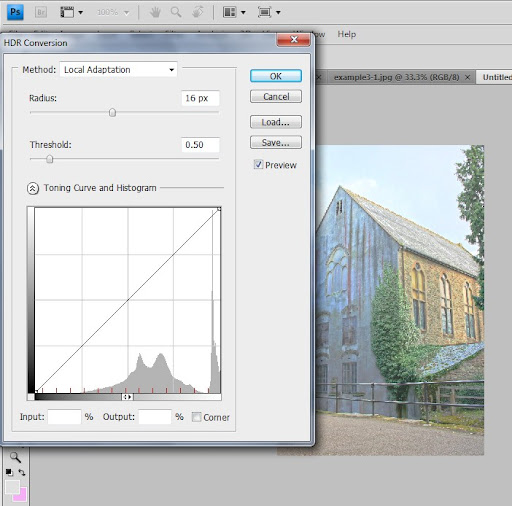
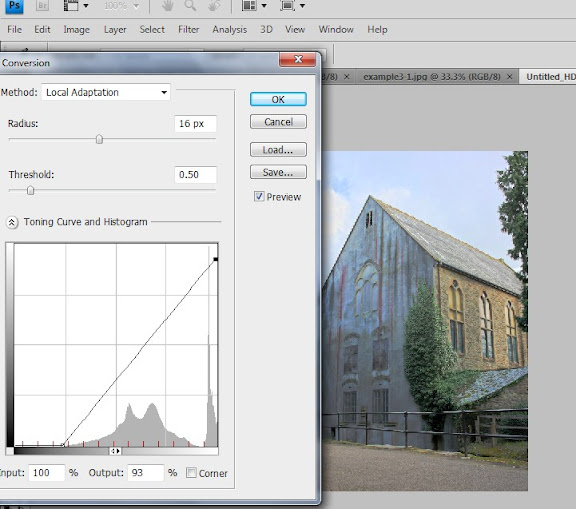
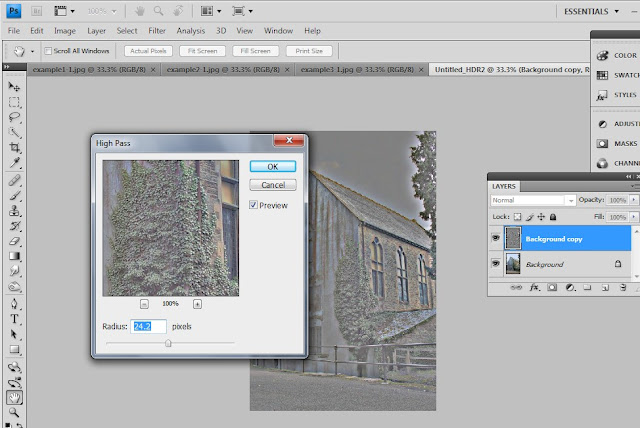
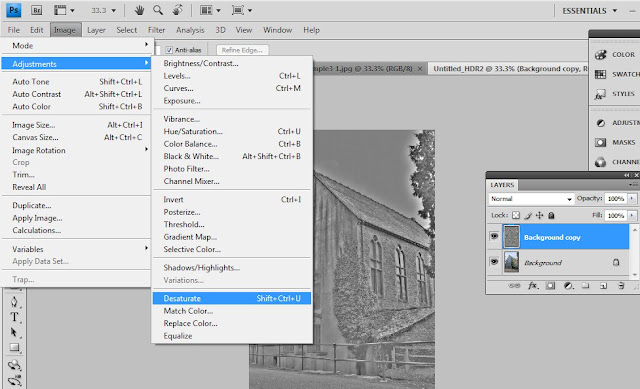
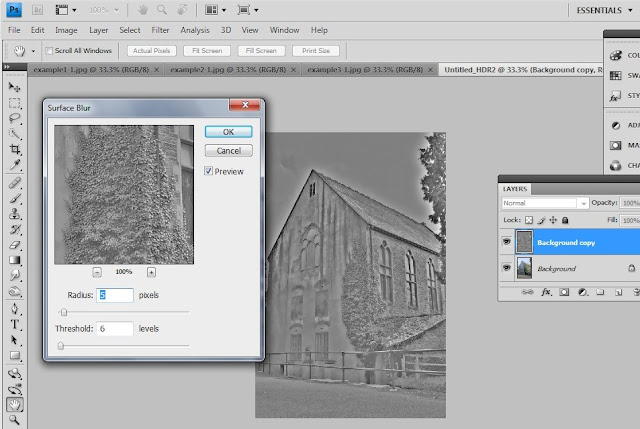
The resulting image starts to look a bit better now, similar to the one I have in the slideshow above. At this point HDR creation is now finished. The following is just standard Photoshop image manipulation: now I want to apply Grudge Effect to this HDR, by doing the following: go to Layer > Duplicate layer > click ok to create a copy of your background layer, go to Filter > Other > High Pass Filter. Then, Image > Adjustments > Desaturate , then Filter > Blur > Surface Blur (can be omitted sometimes) and set the blending mode in layers palette to Overlay (or try other blending modes) and also change the opacity to about 80% or whichever looks good.

The final image created with Photoshop is this:
Of course there is almost unlimited variety of other effect that can be applied in Photoshop to achieve even better results. It's best to play around with settings until you achieve something that looks nice.
Other HDR software
I think currently, Photomatix Pro is the most popular software that allows to create HDRs, as you have seen, with Photoshop it takes a while to create colour-enhanced HDRs, but with Photomatix Pro is can be done almost in seconds . When you start the program, a list of options appear, click Generate HDR image, a short wizzard will appear with the following dialogs:


When you click ok in the last dialog, a preview is generated, which generally doesn't look very good, so click Tone mapping to access a rich set of setting and in particular a drop-down list at the bottom on the left side, that has a couple of presets. I usually select the Grudge preset and then modify the setting from there.
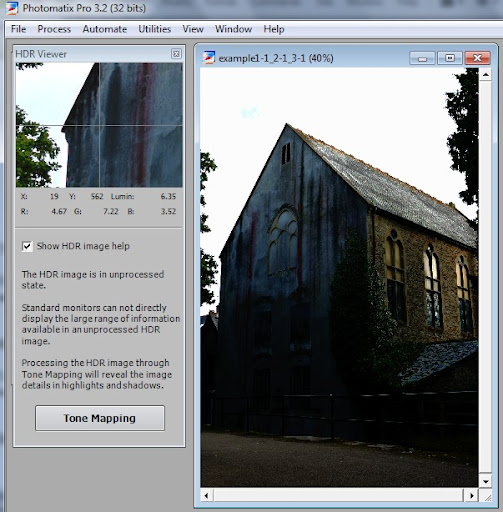
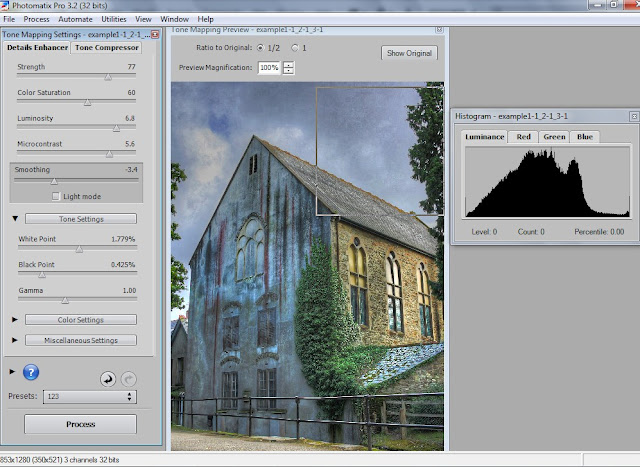
The final image that was generated with Photomatix Pro looks like this:
Which I find a little bit better looking than the one generated with Photoshop. I'll tell you the truth as well, all the images in the slideshow above were generated with Photomatix, because it's just time saving :)
HDR Cheating
There is a small cheat if you want to create an HDR. If you take a picture in RAW format, you can process it at different exposures later on a computer, creating, over-, norma-l, and under- exposed images. And then processing them with either Photoshop or Photomatix, and the result will look a lot like an HDR, although not as good as it would have been if you used three separate images. But in some situations, this is the only option really, if you are using slow shutter speeds, or have wind or other quickly changing scenery.


