2

Funny stuff :D

Posted by Happy Hippo on 5/10/2010 03:40:00 pm


Marco Manzini Landscape and Nature Photography


translated from : http://mihail-kukuruza.livejournal.com/139347.html

3

Tips on photographing Fireworks

Posted by Happy Hippo on 1/12/2010 02:23:00 pm
There are so many amazing pictures on the internet of fireworks, but taking such pictures is very difficult, as I learned in practice. I went to a firework display a few months ago, and now, finally had time to process the raw pictures I took. But I can remember that it was freezing cold that evening and because fireworks are usually fired at night, you need to dress warm and get some gloves if you want to photograph firework displays. Because your fingers may freeze and you won't be able to change settings on you camera :(
Anyway here are some examples I got from photographing fireworks, which I took on Guy Fawkes day (not a very fancy show, but I'm planning to go to one someday and practice more firework shooting):


Here are some tips that you may wish to consider:

    • You will need a tripod or your photos may look blurry (it's hard to make them sharp even with a tripod).
    • Fireworks are shot at night, so you have to guess the settings that give you good results, so you don't really know what aperture, shutter speed, focal length or ISO you want to use until you start taking pictures. On one hand it's dark at night, and you may think that you need high ISO, slow shutter speed and wide aperture, but on the other hand, fireworks are bright, so maybe you don't need setting like that. But also if you zoom in close on fireworks, it's very bright and you need completely different setting, and if you zoom out it's a different story again.
    • Get to the place a bit earlier, so you can find a good spot with clear sky, make sure there are no bright sources shining directly into your lens, and that when more people arrive they wouldn't want to stand in front of your camera.
    • Fix your camera to a tripod and aim at the area of the sky where you think the fireworks will be (you don't have to be very accurate here, because you can always crop your pictures a bit)
    • Landscape or Portrait camera orientation depends on your situation and position. If e.g. the landscape around is ugly, there is no point in capturing it really :)
    • Start with quite general settings like: RAW file formal (really helpful for fireworks), fast or slow shutter speed, depending of the effects you want to achieve and standard aperture (ISO 400-ish..). Do not rely on the light meter this time, it won't tell you anything useful.
    • After fireworks display have started, take a couple of pictures and review them thoroughly, adjusting the settings accordingly. You will probably need to switch to manual focus, and try to focus your camera on one firework quickly and leave the setting for a while. Also, you need to consider the depth of field: if the firework display is very big, you may need deep depth of field (which is achieved with lower aperture and slow shutter speed, see this post for more information).
    • Try different settings (e.g.slow shutter + zoom out+higher iso/apertre, or fast shutter+zoom in+average iso/aperture)
    • It's also a good idea to have a remote control or shutter release, because human reaction is quite important here. A firework may fire and you press the shutter speed, when it's half-way out of the viewing range etc..
    • After you've done the photoshoot, you will probably need to crops most of your pictures, sharpen them and maybe do other corrections like saturation etc..
    • And most importantly: dress warm!

      Thanks for reading!
      If you have more suggestions or want to share links to your pictures, post them in comments!!
        Marco Manzini Landscape and Nature Photography

        5

        How to create a panorama with Autopano, Autostitch (free) and Photoshop

        Posted by Happy Hippo on 1/04/2010 12:45:00 pm
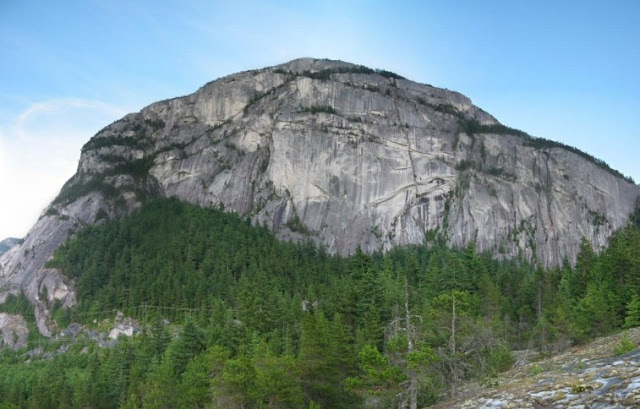
        I woke up this morning at 8am for some reason, although I usually wake up at about 10am this time of year, and saw an amazing view through the window: commonly green grass and trees were white!! Because of morning frost, so I though I needed to take a picture of that!! And I took a couple of panorama-source images just for this tutorial.


        Autopano Pro (Giga)

        The quickest way to create a panorama is to use a program called Autopano. It has a lot of settings that you may want to adjust, and it can recognize automatically which files can be formed into a panorama, so you just select a folder and Autopano groups images into possible panoramas and shows you their preview. Go to 
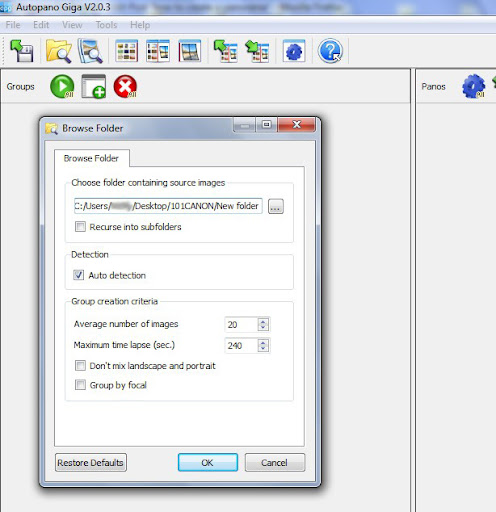
File > Browse Folder , then select the folder you want to analyze and tick Auto-detection:

        Autopano       Autopano 2

        It will then analyze the pictures in your folder and create previews of possible panoramas:

        Autopano preview

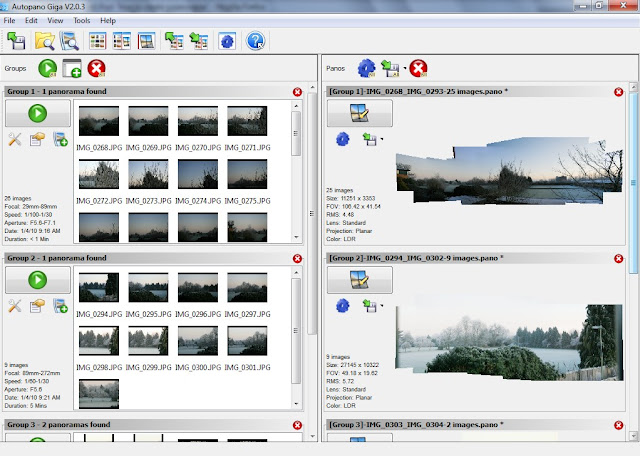
        If you are happy with this selection then just press render, or if you are not, you can also select individual files and create a panorama from them. And also you can edit the panorama setting by clicking the blue button above each panorama preview.


        It will take a few minutes to render your panorama, depending on the size/number/resolution of the pictures and the settings you chose. For this example I chose to reduce the resolution a bit, because it's for web publishing, and doesn't require extremely high resolution. Note: when you combine a number of pictures, the default setting is keep the resolution of each picture, and your final image may have hundreds of megapixels resolution, if left on this setting, and therefore take hours to render, so think what kind of resolution you would need before rendering.


        You will need to crop the final image, and I also like to sharpen it a bit, and do some modifications in Photoshop, like higher contrast, "S-curve" adjustment or even black & white. Thw final image looks like this (Note: because it was shot in the morning, there was a lot of noise, so I had to do noise reduction (added blur) to the picture and I also didn't use highest quality rendering mode in Autopano, just a quick render, but you get the idea how it would look like):


        Auto stitch (free)

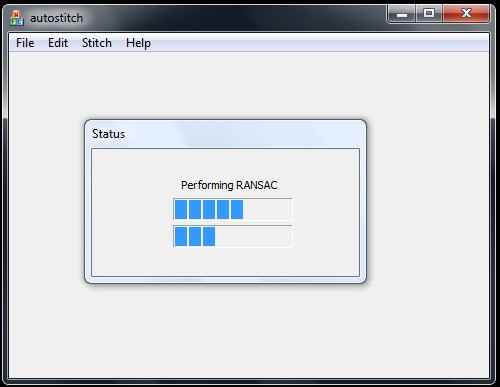
        This is a small program if you don't want to pay for friendly user interface of Autopano Pro and its smart panorama detection features. Autostitch was actually the technology that was developed by the University of British Columbia and then sold to industries like AutoPano, Adobe, Serif, Calico etc for further development. A free version is available to download here. It's still quite good I think, you just go Edit > Options to adjust the resolution and other settings and then select the images you want from File > Open, it will then render the images and open them in the default image editor.

        Auto Stitch Autostitch Autostitch
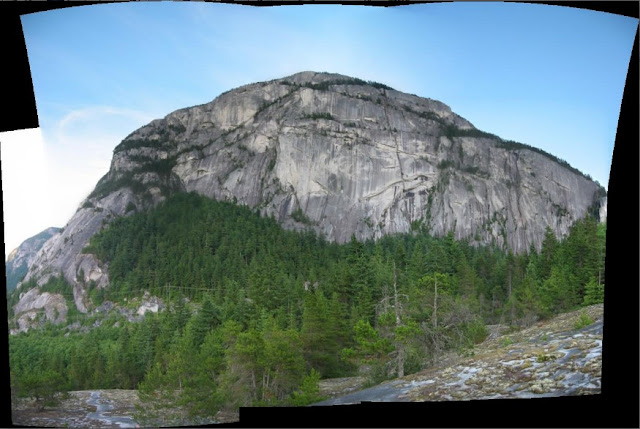
        After the process is complete, you will probably need to crop the generated panorama and maybe do some adjustments (the following images are distributed with Autostitch for testing purposes):


        Photoshop CS4
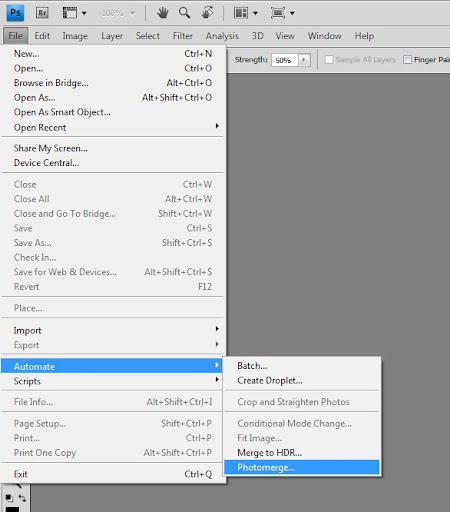
        Photoshop can also be used to create panoramas very easily, just go to File > Automate... > Photomerge... Then select the images you want to add and click ok.

        Photoshop Panorama    Photoshop photo merge
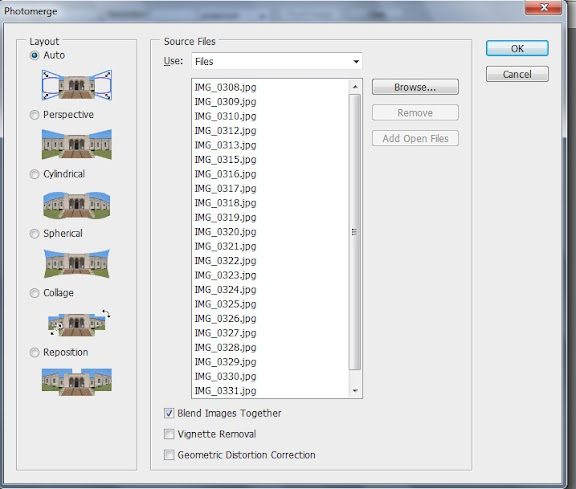
        It will then take some time for Photoshop to render the panorama. And it will give you the final result, which you may want to crop or modify a bit:
        Marco Manzini Landscape and Nature Photography

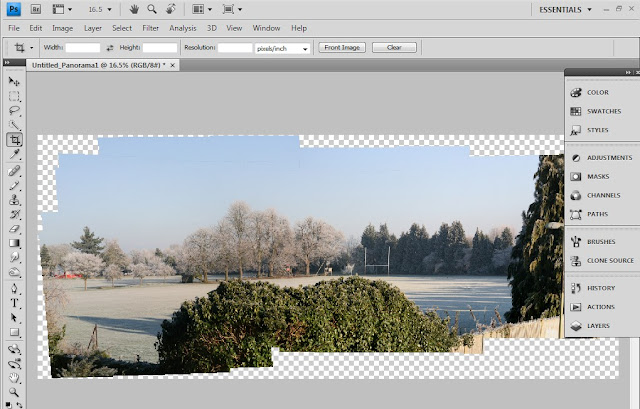
        So the result with Photoshop is (this is another set of shots later in the day with better light conditions);


        Thanks for reading, if you have any questions or suggestions, post them in comments.
        Hippo

        © All content on this site is copyright, except where other sources are specified. Please contact me before using any resources on this blog in any way ©